Before we could start painting the house, we had a couple of other emergency tasks that arose: the water heater stopped working, the dryer stopped working, and water from the bath tub supply line in the upstairs bath began to leak about a bucket a day of water through the ceiling into the living room. Last weekend, we tackled fixing the dryer, and got started fixing the leak in the ceiling. But today I am just going to talk about the dryer.
We have a 10-year-old Kenmore Elite HE3 front-loading washer and matching dryer.
Last November, we put in a load of clothes, pressed the button, and nothing happened. The display panel at the top lit, but the dryer would not start turning or drying. The interior light came on, but that was it. We did a little research on the internet and found that this "symptom" is generally caused by a burnt-out thermal fuse. A little more research was required to track down the right part number for our dryer model. Luckily, there are lots of these dryers still around. In our case, the part number was 3392519. We found the fuses on Amazon from McCombs Supply Company in Lancaster, PA. The fuses run about $2.75 a piece, and McCombs provided free, quick shipping. When the fuse installed in November blew a couple of weeks ago, we ordered two more of the same fuse. Side note: I think that the first fuse that we installed blew due to the fact that the dryer vent needed to be cleaned, which has been rectified.
The first thing that we did was unplug the dryer.

Next, we propped the front of the dryer up with a 3" X 3" fence post remnant, so we could better reach the access panel.

Then we removed the two screws on lower corners of the access panel.

We slid the outer access panel off to reveal the blower wheel housing.
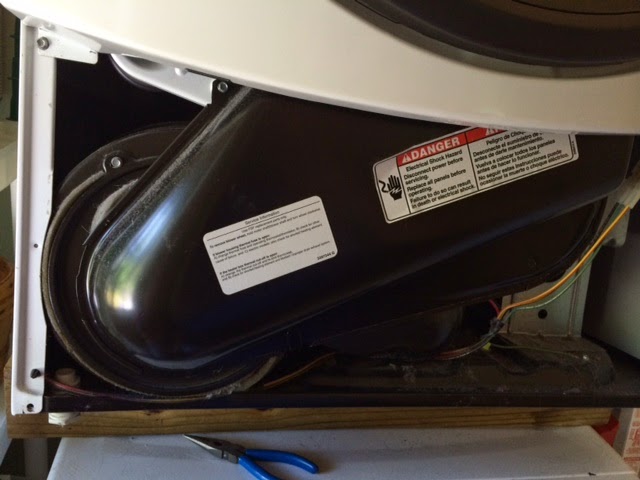
There are three screws that hold the blower wheel housing cover in place - one on the left, seen below at the top:

one on the right:

and one underneath that secures a clip:

We slipped the blower wheel housing off, and cleaned the blower wheel with the vacuum.

The fuse is located above and to the right of the blower wheel.

We loosened the screw that held the fuse in place and slipped it backwards out of the slot.

Then, we slipped the two connectors off the fuse.

We got the new fuse from the package.


We connected the connectors to the new fuse and installed it in the slot.

Then, we tightened the screw that holds the fuse back into place.

We replaced the blower wheel housing, and the access panel, and removed the fence post used to prop up the dryer. Then we plugged the dryer back in and - TADA - it works!

The whole process only took about 45 minutes, and most of that was spent looking for the right size hex wrench.
No comments:
Post a Comment